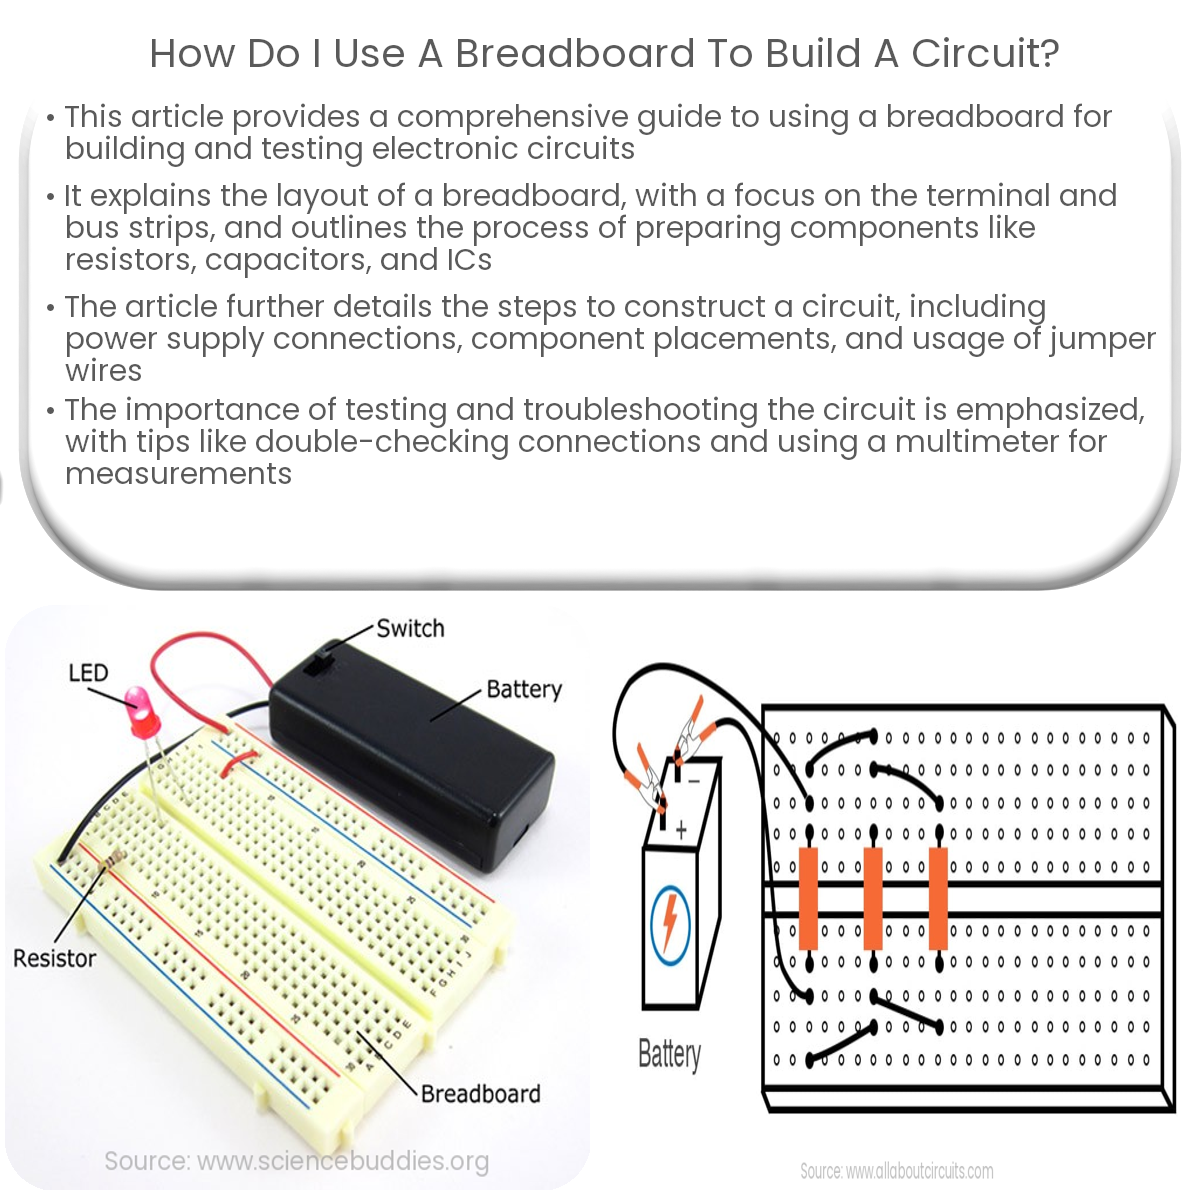
To use a breadboard, insert components into terminal strips, connect power supply to bus strips, use jumper wires for connections, and test the circuit.
Using a Breadboard to Build a Circuit
A breadboard is an essential tool for building and testing electronic circuits without soldering. It allows you to create temporary connections between components, making it ideal for prototyping and experimentation. In this article, we will discuss how to use a breadboard to build a circuit.
Understanding Breadboard Layout
Breadboards typically have two main sections: the terminal strip and the bus strip. The terminal strip consists of horizontal rows of five interconnected sockets, while the bus strip contains vertical columns of interconnected sockets for power supply connections.
Preparing Components
Before you start, gather all the components you’ll need for your circuit, such as resistors, capacitors, LEDs, and integrated circuits (ICs). Trim the leads of these components as needed to ensure a snug fit on the breadboard.
Building the Circuit
-
Power Supply: Connect your power supply (e.g., a battery or voltage regulator) to the breadboard’s bus strips. The positive terminal should connect to the red bus strip, and the negative terminal should connect to the blue or black bus strip.
-
Placing Components: Insert components into the terminal strips, ensuring that each lead is in a separate row. Pay attention to the orientation of polarized components, such as LEDs and electrolytic capacitors.
-
Connecting Components: Use jumper wires to create connections between components. Make sure to connect the appropriate leads based on your circuit diagram.
-
Integrated Circuits (ICs): When using ICs, place them across the center gap on the breadboard to ensure that each pin is isolated. Connect the power supply pins and other components as per the IC’s datasheet.
Testing and Troubleshooting
Once you’ve completed your breadboard circuit, it’s essential to test and troubleshoot any issues. Here are some tips:
-
Double-check your connections and component orientation against the circuit diagram.
-
Ensure all components are properly seated and making good contact with the breadboard’s sockets.
-
Use a multimeter to measure voltage and continuity, verifying that your circuit is functioning as expected.
-
If your circuit isn’t working, check for loose connections, incorrect component values, or damaged components.
By following these steps, you can successfully use a breadboard to build and test electronic circuits, enhancing your understanding of electronics and enabling you to create functional prototypes.