A CPU heatsink is a vital cooling component that dissipates heat from processors, maintaining optimal temperatures and preventing damage.
CPU Heatsinks: A Comprehensive Guide to Cooling Your Processor
Part 1: Introduction to CPU Heatsinks
As computer technology continues to advance, the demand for faster and more powerful processors grows. These high-performance CPUs generate a significant amount of heat, which can cause the processor to overheat and lead to system instability or even permanent damage. To prevent this, it’s essential to have an effective cooling system in place. This is where CPU heatsinks come into play.
What is a CPU Heatsink?
A CPU heatsink is a vital component of any computer’s cooling system. It’s a metallic structure, typically made from aluminum or copper, designed to draw heat away from the processor and dissipate it into the surrounding air. The larger surface area of the heatsink, combined with its thermal conductivity properties, enables it to effectively transfer heat away from the CPU and maintain optimal operating temperatures.
How Does a CPU Heatsink Work?
A CPU heatsink works on the principle of thermal conduction. As the processor generates heat, this heat is transferred to the heatsink through direct contact with the CPU. The heatsink’s metal composition allows it to conduct heat rapidly, spreading it evenly across its surface. This process increases the surface area exposed to the ambient air, allowing the heat to dissipate more effectively. Additionally, most heatsinks are equipped with fins or ridges to increase their surface area further and improve heat dissipation.
Types of CPU Heatsinks
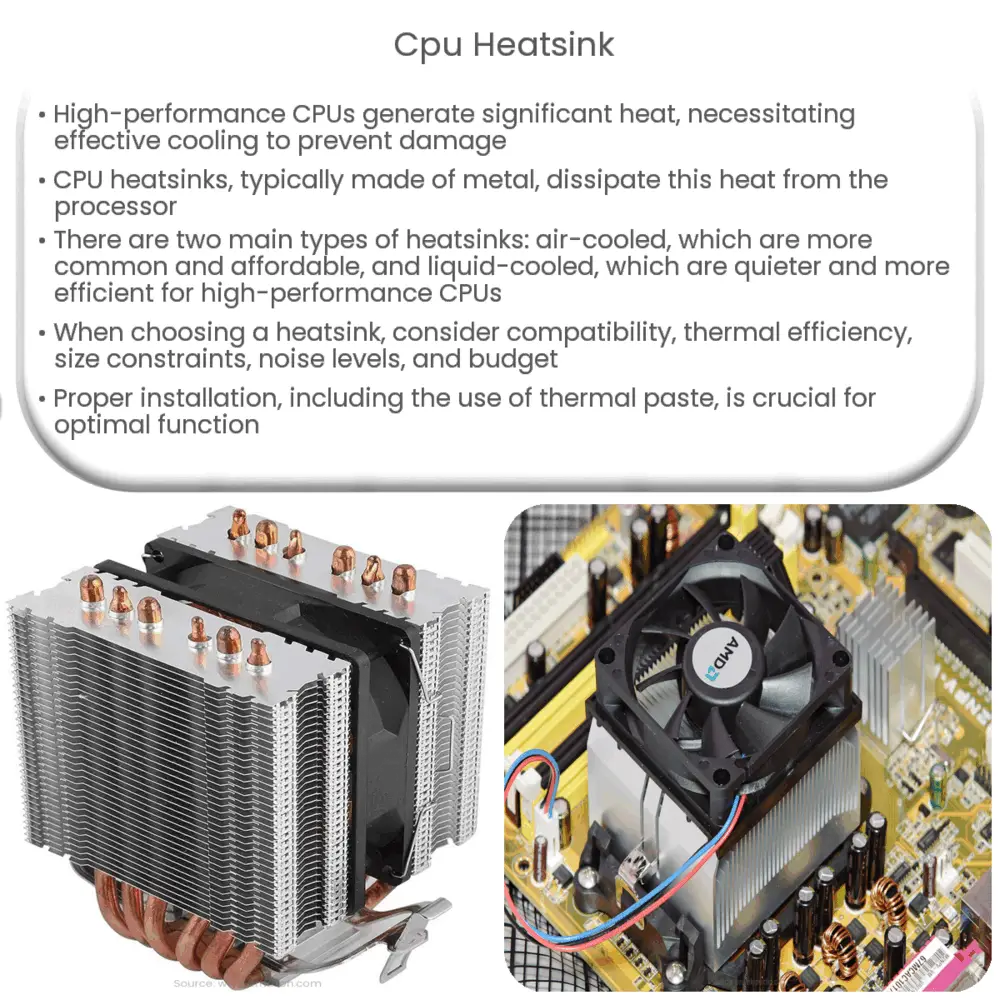
There are two primary types of CPU heatsinks: air-cooled and liquid-cooled. Each type has its own set of advantages and disadvantages, depending on the specific requirements of the computer system and user preferences.
Air-Cooled Heatsinks
Air-cooled heatsinks are the most common and widely used type of CPU cooling solution. They consist of a metal heatsink, often equipped with fins or ridges, and one or more fans to move air across the heatsink’s surface. This airflow helps to dissipate heat more quickly and maintain optimal CPU temperatures.
Advantages of air-cooled heatsinks include their relatively low cost, ease of installation, and low maintenance requirements. However, they can be less efficient at cooling high-performance CPUs compared to liquid cooling solutions, and may produce more noise due to fan operation.
Liquid-Cooled Heatsinks
Liquid-cooled heatsinks use a liquid coolant to absorb and transfer heat away from the CPU. This type of cooling solution typically consists of a water block (which makes direct contact with the CPU), a radiator, fans, and tubing to circulate the coolant between the water block and radiator. The fans then cool the liquid by blowing air over the radiator’s surface.
While liquid cooling systems are generally more efficient at cooling high-performance processors and produce less noise, they can be more expensive, challenging to install, and may require more maintenance than air-cooled solutions.
Factors to Consider When Choosing a CPU Heatsink
When selecting the ideal CPU heatsink for your computer system, there are several factors to consider:
- Compatibility with your CPU socket type
- Thermal performance and cooling efficiency
- Size and physical constraints within your computer case
- Noise levels produced by fans
- Price and budget considerations
Part 2: Selecting and Installing a CPU Heatsink
Compatibility with CPU Socket Type
It’s crucial to ensure that the CPU heatsink you choose is compatible with your processor’s socket type. Most manufacturers provide socket compatibility information on their product pages or packaging. If you’re unsure, consult your CPU or motherboard documentation for the correct socket type.
Thermal Performance and Cooling Efficiency
When comparing CPU heatsinks, it’s important to consider their thermal performance and cooling efficiency. These factors can be influenced by the heatsink’s material, size, and design, as well as the type of cooling solution (air or liquid). Look for reviews and benchmarks that compare the performance of different models under various workloads to make an informed decision.
Size and Physical Constraints
Before purchasing a CPU heatsink, ensure that it will fit within your computer case and not obstruct other components, such as RAM modules or graphics cards. Pay close attention to the dimensions of the heatsink and the clearance it requires. Some high-performance air-cooled heatsinks can be quite large, while liquid-cooling solutions may require additional space for the radiator and tubing.
Noise Levels
Noise levels produced by the fans can be an important consideration, especially if you’re looking for a quiet computer system. Air-cooled heatsinks tend to produce more noise due to their reliance on fans, while liquid-cooling solutions are generally quieter. Look for fan specifications that indicate noise levels in decibels (dB) and consider models with adjustable fan speeds to balance cooling performance and noise.
Price and Budget Considerations
Finally, consider your budget when selecting a CPU heatsink. While liquid cooling solutions often provide better performance, they can be more expensive than air-cooled options. Weigh the benefits of each type of cooling solution against your specific needs and budget constraints to make the best choice for your system.
Installing a CPU Heatsink
Once you’ve selected the appropriate CPU heatsink, it’s time to install it. Follow these general steps for a successful installation:
- Turn off your computer and disconnect all cables, including the power cable.
- Open the computer case to access the motherboard and CPU.
- Remove the old heatsink (if applicable) by releasing the retention clips or screws and carefully lifting it off the CPU.
- Clean the CPU surface with isopropyl alcohol and a lint-free cloth to remove any residual thermal paste.
- Apply a small amount of thermal paste to the center of the CPU. This paste will help to fill in any microscopic gaps between the CPU and heatsink, ensuring optimal heat transfer.
- Position the new heatsink over the CPU, aligning it with the mounting holes or clips.
- Secure the heatsink to the motherboard using the provided mounting hardware, and connect any necessary fan or pump cables to the appropriate headers on the motherboard.
- Close the computer case, reconnect all cables, and turn on your computer to ensure proper heatsink function.
By selecting and installing the right CPU heatsink for your system, you can maintain optimal processor temperatures, extend the lifespan of your hardware, and achieve better overall performance.